
Creating a recovery USB now guarantees you’re ready to restore your system quickly if issues arise. Choose a reliable USB drive with enough capacity and fast transfer speeds, then download official recovery software and set it up securely with encryption. Test it on your device to confirm it works, store it safely, and update regularly. If you stay proactive, you’ll be prepared for emergencies. If you want to know the detailed steps, keep exploring the process.
Key Takeaways
- Select a reliable, high-quality USB drive with sufficient capacity and security features for creating a bootable recovery device.
- Download official recovery software and enable data encryption during setup to protect sensitive information.
- Test the recovery USB on multiple devices to ensure compatibility and proper functionality before an emergency occurs.
- Store the recovery USB in a secure, protected location and regularly verify its integrity and update it as needed.
- Recreate or update the recovery drive after major system changes or software updates to ensure it remains functional.
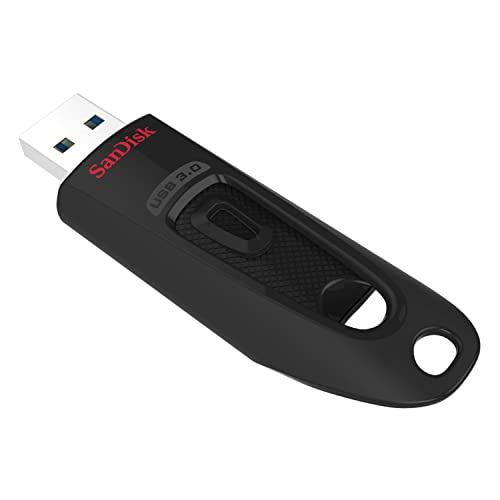
SANDISK 32GB Ultra USB 3.0 Flash Drive – SDCZ48-032G-GAM46
Transfer speeds up to 10x faster than standard USB 2.0 drives (4MB/s); up to 130MB/s read speed; USB…
As an affiliate, we earn on qualifying purchases.
As an affiliate, we earn on qualifying purchases.
Why Creating a Recovery USB Is a Critical First Step
Have you ever considered what you’d do if your computer suddenly crashed and wouldn’t start? Creating a recovery USB is a critical first step because it guarantees you can restore your system quickly. Relying solely on cloud backup is helpful, but having a physical recovery drive adds an extra layer of security. It allows you to bypass potential internet issues and directly access your system’s recovery tools. Additionally, antivirus protection is essential; it keeps your files safe from malware that could corrupt your backup or infect your system during recovery. Having a recovery USB ready means you’re prepared for hardware failures, malware attacks, or software glitches. It’s a proactive move that saves time, prevents data loss, and keeps your digital life running smoothly. Incorporating system security measures can further safeguard your recovery process and ensure the integrity of your data. Regularly testing your recovery drive ensures it functions correctly when you need it, which is a crucial step in maintaining your system reliability. Making sure your recovery process is well-understood and easy to use can make a significant difference in emergency situations. Also, considering physical security of your recovery media prevents unauthorized access in case of theft or loss. Moreover, understanding regional flavors and pairing options can be a delightful way to enhance your coffee or tea experience during recovery downtime.

64GB – Bootable USB Drive 3.2 for Windows 11/10 / 8.1/7, Install/Recovery, No TPM Required, Included Network Drives (WiFi & LAN),Supported UEFI and Legacy, Data Recovery, Repair Tool
Beginner watch video instruction ( image-7 ), tutorial for "how to boot from usb drive", Supported UEFI and…
As an affiliate, we earn on qualifying purchases.
As an affiliate, we earn on qualifying purchases.
How to Choose the Best USB Drive for Recovery

Choosing the right USB drive is vital to guaranteeing your recovery process goes smoothly when you need it most. Look for a drive with reliable USB security features and support for data encryption to protect sensitive information. Capacity matters—aim for at least 16GB, but consider 32GB or more if you’ll include multiple recovery tools. Speed is also essential; USB 3.0 or higher offers faster data transfer. Durability and brand reputation ensure longevity. Additionally, understanding Vetted options can help you select a trusted device from reputable manufacturers. When selecting a USB drive, pay attention to USB security features like hardware encryption and password protection to safeguard your recovery data from unauthorized access. Recognizing privacy policies and how they impact your data security can further influence your choice. Being aware of data handling practices can help you select a device that aligns with your security needs. Ensuring the device complies with security standards can provide added confidence in its protection capabilities. Here’s a quick comparison:
| Feature | Importance | Recommended Specs |
|---|---|---|
| USB Security | Protects recovery data from unauthorized access | Hardware encryption, password protection |
| Data Encryption | Ensures confidential info remains secure | Support for AES encryption |
| Storage Capacity | Holds recovery files comfortably | 32GB or higher |

Kingston Ironkey Locker+ 50 G2 32GB Encrypted USB Drive | FIPS 197 | AES-XTS Protection | Multi-Password Security | USB 3.2 Gen 1 | IKLP50G2/32GB
XTS-AES 256-bit hardware-encryption
As an affiliate, we earn on qualifying purchases.
As an affiliate, we earn on qualifying purchases.
Download and Prepare Recovery Software
Before you can create a recovery USB, you need to download the appropriate recovery software for your system. Ensure the software is compatible with your hardware, as hardware compatibility is crucial for a smooth recovery process. Once downloaded, verify that the software supports data encryption if you plan to protect sensitive information. This step safeguards your data during recovery. Additionally, consider reviewing the recycling options for old electronics to dispose of any outdated or unused recovery media responsibly. To prepare effectively, focus on these steps:
- Check system requirements to confirm hardware compatibility.
- Download the official recovery software from the manufacturer’s website.
- Enable data encryption options during setup for added security.
- Familiarize yourself with digital concepts to better understand the recovery process and potential risks.
Completing these steps ensures your recovery software is ready, secure, and compatible, making future recovery straightforward and safe.
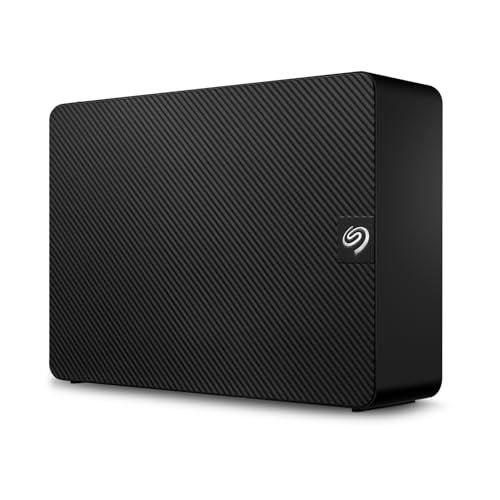
Seagate Expansion 8TB External Hard Drive HDD – USB 3.0, with Rescue Data Recovery Services (STKP8000400)
Easy-to-use desktop hard drive—simply plug in the power adapter and USB cable
As an affiliate, we earn on qualifying purchases.
As an affiliate, we earn on qualifying purchases.
How to Create Your Recovery USB in Easy Steps
Once your recovery software is downloaded and set up securely, creating a recovery USB becomes a straightforward process. First, make sure your USB drive has enough storage capacity and is compatible with your device’s hardware. Insert the USB into your computer and launch the recovery software. Follow the on-screen prompts to select the USB as the destination for the recovery image. During this process, verify hardware compatibility to prevent errors. For added security, enable data encryption if the option is available, safeguarding your sensitive information. Confirm your selections and start the creation process. Once complete, safely eject the USB, label it clearly, and store it in a secure location. Properly filter sizing/flow considerations can also improve your system’s overall reliability. Additionally, ensuring your backup device is stored in a secure location can prevent unauthorized access. Regularly updating your recovery media is a crucial aspect of disaster preparedness, ensuring your system remains protected against evolving threats. Incorporating regulatory and environmental considerations when creating and storing your recovery USB can further enhance your data protection strategy. Understanding hardware compatibility is essential for a smooth setup process. This simple setup ensures you’re prepared for any future system issues.
How to Test Your Recovery USB to Make Sure It Works

To guarantee your recovery USB is ready, you need to verify it boots correctly. Test it on different devices to confirm compatibility and reliability. This way, you’ll know it works when you really need it.
Verify Bootability Properly
Testing your recovery USB to verify it boots correctly is a crucial step that many overlook. To confirm it works, you need to verify the bootability by checking the boot sequence and BIOS settings. First, insert your recovery USB and restart your device. Second, access the BIOS or UEFI firmware settings—usually by pressing a key like F2 or DEL during startup. Third, adjust the boot order if necessary, placing the USB device at the top. This guarantees your system attempts to boot from the recovery drive first. Once configured, save your settings and restart. If your device boots into the recovery environment, the USB is ready. If not, revisit the BIOS settings and boot sequence, making adjustments until your recovery USB boots successfully.
Conduct Test on Different Device
After confirming your recovery USB boots correctly on your primary device, it’s a good idea to test it on a different computer. This guarantees device compatibility across various hardware configurations. Connect the USB and attempt to boot from it; if it works, your recovery tool is versatile. Pay attention to any prompts related to data encryption, especially if your backup uses encryption for security. Confirm that the recovery environment recognizes encrypted data and can decrypt it properly. Testing on a different device helps identify potential issues with compatibility or encryption that could prevent successful recovery in an emergency. Ensuring your recovery USB functions reliably on multiple devices gives you confidence that it will work when you need it most.
How to Store and Maintain Your Recovery USB for Long-Term Use
Proper storage and maintenance are essential to guarantee your recovery USB remains functional when you need it most. To assure your drive’s longevity, prioritize storage security and protect drive durability. First, store your USB in a cool, dry place away from direct sunlight and static. Second, use a protective case or sleeve to prevent physical damage and dust buildup. Third, periodically check the drive’s integrity by plugging it into a computer and verifying data access. Keep the USB disconnected when not in use to avoid unnecessary wear. Regularly update your backup files and re-copy the recovery image if needed. Incorporating storage best practices from home organization principles can further enhance your drive’s lifespan. Additionally, maintaining a consistent cleaning routine can help prevent dust and debris from affecting your USB’s performance. Furthermore, understanding the testing accuracy of your recovery tools can ensure dependable performance over time. Ensuring your USB has a proper power source can also help avoid issues caused by inconsistent electrical supply. Following these steps helps preserve your recovery USB’s functionality, ensuring it’s ready when emergencies arise.
Troubleshooting Common Problems When Making Your Recovery Drive
When creating your recovery drive, you might encounter issues like insufficient storage space, a corrupted USB, or compatibility problems with your system. These challenges can prevent successful creation or recovery later on. Knowing how to troubleshoot these common problems helps guarantee your USB is ready when you need it. Ensuring your device has the correct smart thermostat setup protocols can also prevent compatibility issues during the process. Additionally, verifying the USB health and compatibility before starting can save time and frustration. Using a reliable extension cord to power your devices during setup can prevent power interruptions that might cause errors. Regularly checking your system hardware and software ensures everything is functioning correctly and reduces the risk of encountering issues during critical moments.
Insufficient Storage Space
If your storage device doesn’t have enough space to hold your recovery files, creating a recovery USB becomes impossible until you free up some room. Insufficient storage capacity can prevent the transfer of essential files, especially if data encryption is enabled, which increases file size. To free up space:
- Delete unnecessary files or backups from the device.
- Transfer large media or documents elsewhere to clear space.
- Use disk cleanup tools to remove temporary files and system clutter.
Confirm your device has enough storage capacity for the recovery files before starting. If you’re using encryption, verify that the device still has ample room after encryption overhead. Clearing space ensures your recovery drive will be complete and functional when needed.
Corrupted USB Drive
A corrupted USB drive can prevent you from successfully creating a recovery drive, often resulting in errors or incomplete files. Data encryption on the USB might interfere with the writing process, causing read or write errors. If your drive is encrypted, try decrypting it before attempting to create the recovery media. Additionally, USB port issues can cause connectivity problems, disrupting the transfer. Switch to a different port or restart your computer to resolve temporary glitches. Confirm your USB drive is functioning correctly by testing it on another device. If problems persist, consider reformatting the drive, but back up its data first, as formatting erases everything. Addressing encryption and port issues helps restore your USB’s integrity, making it suitable for recovery drive creation.
Compatibility Issues With System
Compatibility issues between your system and the recovery USB can prevent successful creation or usage of the drive. To avoid this, confirm your system meets the necessary requirements.
- Verify system compatibility: Check if your operating system supports creating bootable recovery drives, especially if you’re using an older or specialized system.
- Address driver issues: Update your device drivers, especially USB controllers, to prevent conflicts that could hinder drive recognition.
- Use supported formats: Make sure your USB drive is formatted correctly (e.g., FAT32 or NTFS), as incompatible formats may cause creation failures.
When Should You Recreate or Update Your Recovery USB?
Knowing when to recreate or update your recovery USB is essential to guarantee it remains reliable when you need it most. You should consider recreating or updating it after major hardware changes, such as replacing your hard drive, motherboard, or other critical components, to make sure compatibility. Additionally, keep your recovery USB current by updating it whenever you install significant software updates or new operating system versions, as these can alter system files or configurations. Regularly revisiting your recovery drive also helps verify that it functions correctly and that all necessary tools are present. If you notice any errors or inconsistencies, it’s a sign to recreate or refresh your recovery USB. Staying proactive ensures you’re prepared for any system failure or emergency.
Frequently Asked Questions
Can I Use a Recovery USB on Different Computer Brands or Models?
Yes, you can use a recovery USB on different computer brands or models, but device compatibility and USB customization are key. Make certain the recovery drive is created with generic or widely compatible tools. Some manufacturers customize recovery USBs for their devices, so if you use a generic one, it might not work on all systems. Always verify compatibility before attempting to use a recovery USB across various brands or models.
How Often Should I Update My Recovery USB for Maximum Effectiveness?
You should update your recovery USB at least once a year for maximum effectiveness. Regular usb maintenance guarantees your recovery updates include the latest system files and security patches, making it reliable during emergencies. Keep an eye on software updates from your OS provider and refresh your recovery drive accordingly. This habit helps prevent outdated tools from hindering your recovery process when you need it most.
Is It Safe to Store My Recovery USB in a Remote or Unsecured Location?
Storing your recovery USB in a remote or unsecured location isn’t safe because of potential theft or damage. Imagine losing access to critical data during an emergency—secure storage guarantees it’s protected. Accessibility concerns are valid, but you should keep it in a safe, locked place, like a secure safe or encrypted storage, rather than a public or easily accessible area. Prioritizing secure storage minimizes risks and guarantees your recovery tools are available when needed.
What Are the Signs That My Recovery USB Has Become Corrupted or Unusable?
You’ll notice your recovery USB has become corrupted or unusable if it won’t recognize on your device, or if data retrieval takes longer than usual. USB durability can decline over time, leading to potential failures, and compromised data encryption might cause access issues. Regularly test your recovery USB on different systems, and consider encrypting it securely to protect your data, ensuring it remains reliable when you need it most.
Can I Create Multiple Recovery USBS for Different Operating Systems?
Yes, you can create multiple recovery USBs for different operating systems, like assembling a toolkit for every emergency. Each bootable drive acts as a guardian, safeguarding your data preservation when trouble strikes. Think of it as having a map for each terrain, ensuring you’re prepared no matter which system needs rescue. This way, you’re not just reacting to issues but proactively building a fortress of readiness for all your essential digital landscapes.
Conclusion
Creating a recovery USB before you need it is like planting a seed for peace of mind—you hope it never has to sprout, but you’re grateful it’s there when needed. By preparing now, you guarantee you’re not caught in the storm unprotected. Think of this drive as your digital lifeboat—ready to save your data and restore your system. Don’t wait for the crisis—build your safety net today before the unexpected strikes.