TL;DR
Moving your rig into a closet or small space can drastically cut noise and echo, but only if you treat it correctly. Focus on placement, sealing cracks, and ventilation—foam alone won’t cut it. A well-placed, ventilated closet can be a quiet sanctuary for voice-over work or AI computing.
Imagine a whisper-quiet workspace, free from the hum of your high-powered rig or the echo of your vocal takes. The secret often isn’t fancy foam or complicated soundproof rooms—it’s smart placement and simple tricks. Moving your setup into a closet or small room can turn chaos into calm, if you know how to treat it right. This guide dives into making your tiny space work for you—without overbuilding or losing your mind.
You’ll learn why distance beats foam, how to ventilate a sealed closet, and where to place acoustic treatments for real results. Whether you’re recording vocals or running a noisy AI rig, these tips will help you create a quiet, efficient zone that’s easy to maintain.
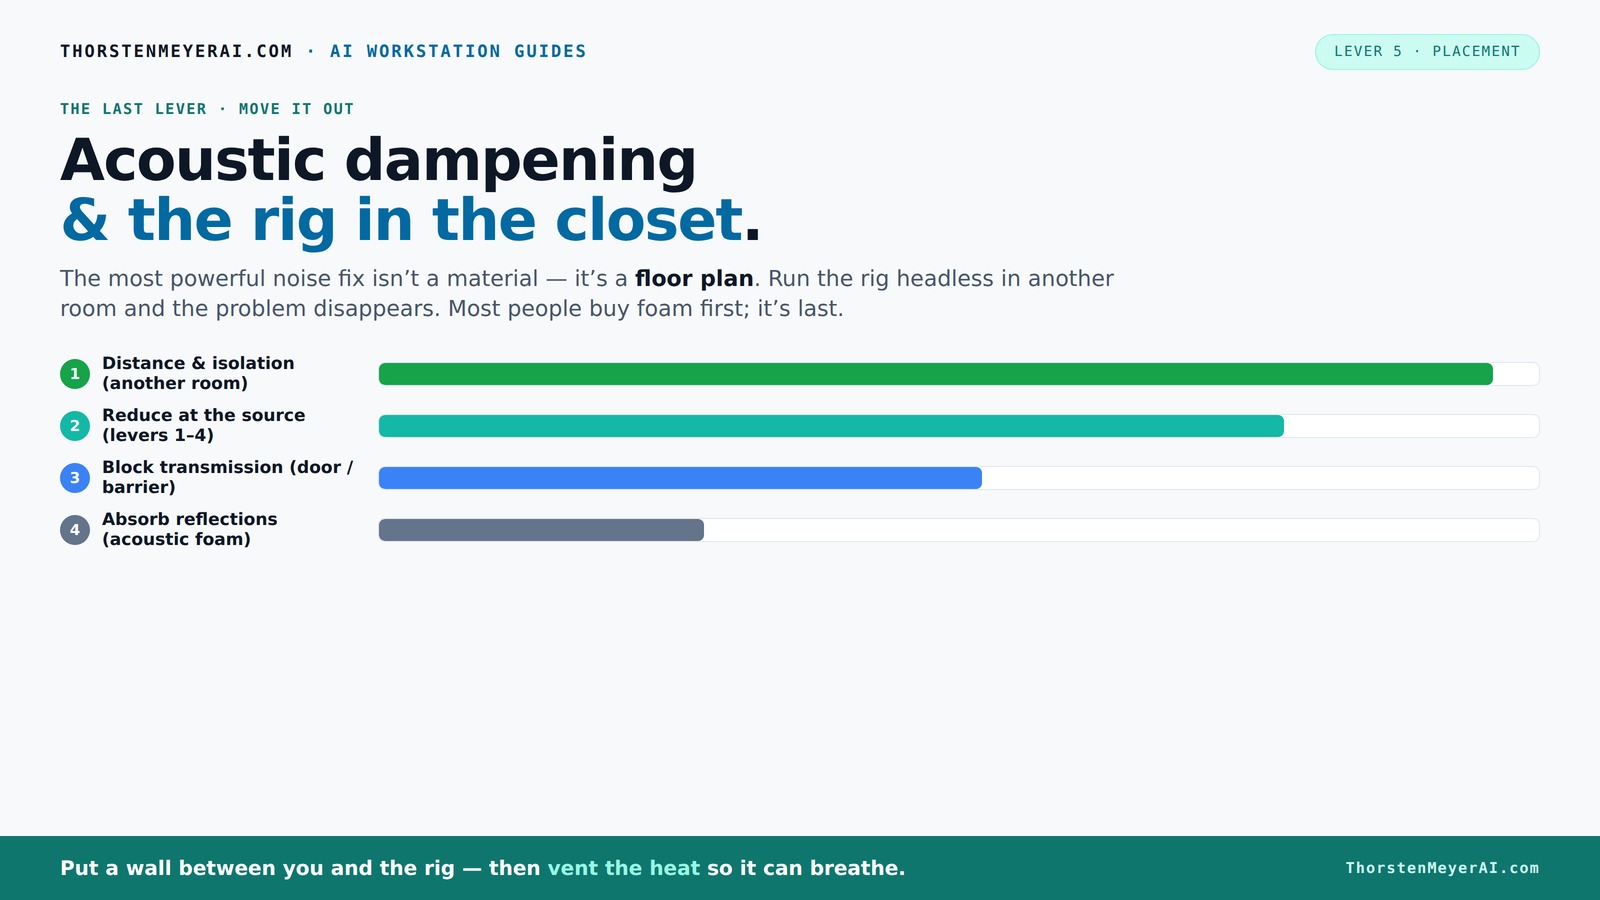
Acoustic dampening
& the rig in the closet.
The most powerful noise fix isn’t a material — it’s a floor plan. A rig you can’t hear because it’s in another room beats any amount of foam. Tap the approaches in Part 1 to see what actually works.
(another room)
(levers 1–4)
(door / barrier)
(acoustic foam)
Contain the noise, not the heat
Key Takeaways
- Moving your rig into a different room is the most effective noise reduction method.
- Sealing cracks and gaps around doors and seams vastly improves sound isolation.
- Treat the first reflection points—walls behind and beside the microphone—for clearer recordings.
- Proper ventilation and airflow are must-haves when placing a rig in a sealed closet.
- Foam alone isn’t enough; combine absorption, sealing, and decoupling for real noise control.
12 Pack Self-Adhesive Acoustic Panels, 12" X 12" X 0.4" High-Density Sound Proof Foam Panels for Walls, Soundproof Wall Panels for Home & Office (Black)
Superior Noise Reduction & Echo Cancellation - Tired of background noise and poor acoustics? Our soundproof wall panels...
As an affiliate, we earn on qualifying purchases.
As an affiliate, we earn on qualifying purchases.
Why Moving Your Rig Is the Cheapest, Easiest Noise Fix
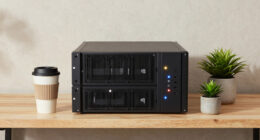
Putting your rig in another room is the most effective way to silence it. Think of it like hiding the loud neighbor—if it’s behind a wall, you don’t have to drown out the noise. For voice-over or music, the rig can roar in a closet while your workspace stays silent. All you need is a good network connection and ventilation.
Take a typical AI workstation—600W of heat, loud fans, and all. If it’s in your office, the noise is unavoidable. Move it to a basement or a spare closet, and suddenly, your microphone picks up almost nothing. It’s the difference between hearing the fans and hearing nothing but silence. That’s why this step is king.

4 Pack Sound Proof Foam Panels 48x24x2 Acoustic Foam Panels Egg Crate Foam for Walls Soundproof Studio Noise Thermal Insulation Soundproofing Waterproof with Adhesive Stickers
Superior Sound Absorption: High-density foam panels absorb echoes and background noise to enhance clarity in studios and home...
As an affiliate, we earn on qualifying purchases.
As an affiliate, we earn on qualifying purchases.
The 'Rig in the Closet' Setup — How to Keep It Cool Without Overheating
Sealing a closet for a rig sounds perfect—quiet and out of sight. For more tips, see Acoustic Dampening, Placement, and the "Rig in the Closet" Setup. But a sealed space traps heat, turning your quiet haven into a hotbox. GPUs and CPUs pumping out 600W or more will push the temperature sky-high without airflow.
To avoid cooking your hardware, incorporate active ventilation. Use a quiet exhaust fan pulling hot air out, and make sure cool air can flow in. DIY solutions include installing a small, quiet fan or creating vents with acoustic dampening in mind. For serious setups, consider a purpose-built soundproof cabinet with ducted airflow and temperature controls. This way, you keep your rig cool while maintaining silence.
Learn more about balancing heat and noise in a dedicated guide on [reducing heat and noise in AI workstations](https://thorstenmeyerai.com/reduce-heat-noise-ai-workstation/).

8" Room to Room Fan with Remote, Reversible Through Wall Fan for Quietly Circulating Air, 320 CFM Through the Wall Fan with Temperature Control, Durable Build Quality, In Wall Fan for Closet, Laundry
【QUIET, MOVE MASSIVE AIR】 This room to room fan quietly circulates air between two rooms to maintain a...
As an affiliate, we earn on qualifying purchases.
As an affiliate, we earn on qualifying purchases.
Placement Strategies That Maximize Noise Reduction
Where you position your microphone and treatment materials matters as much as the materials themselves. Start by fixing the mic’s position—ideally, away from reflective surfaces and directly facing the sound source. You can learn more about placement strategies that maximize noise reduction. Then treat the first reflection points: the wall behind the mic and nearby surfaces.
In small closets, parallel walls can cause flutter echo and low-end buildup. To combat this, place soft materials like acoustic panels or moving blankets at key reflection points—especially at ear level and just behind the mic. Use thicker panels (2-4 inches) for better bass absorption in tiny spaces. Remember, the goal is to tame harsh reflections without muffling your sound.
For example, hanging a thick blanket behind your mic and adding foam panels at side walls can cut echo and improve clarity—making your voice sound warm and professional.

VEVOR Portable Vocal Booth, 6.56 ft Height, Portable Recording Studio with Travel Bag, Mobile Tablet Stand, Thickened Soundproofing, Sound Isolation Booth for Echo-Free Vocals, Podcasts, Voiceovers
Say Goodbye to Echoes: Built with durable Oxford cloth and acoustic padding, this recording booth for the home...
As an affiliate, we earn on qualifying purchases.
As an affiliate, we earn on qualifying purchases.
How to Seal Cracks and Gaps for True Sound Isolation
Sound leaks through cracks, gaps, and poorly sealed doors. Simple weatherstripping around the door frame and sealing seams with acoustic sealant makes a world of difference. It’s like putting a lid on a noisy pot—less sound escapes, more stays inside.
Check for gaps around the door, window, and wall joints. Use removable weatherstripping or acoustic door sweeps for easy access if needed. These small tweaks can improve your isolation dramatically, especially when combined with a door curtain or hanging blanket.
For instance, sealing a closet door with weatherstripping cut noise by over 20 dB, according to expert sources. It’s cheap and quick, but often overlooked.
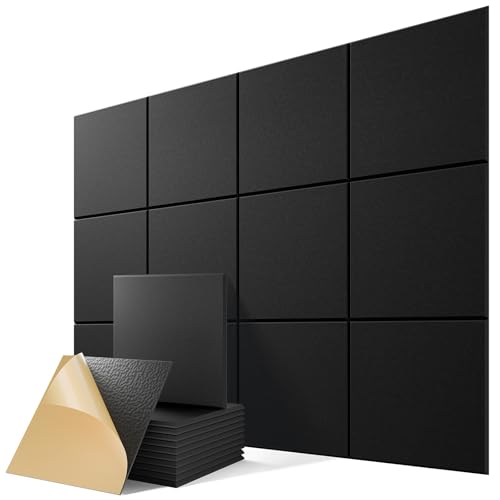
Foam, Blankets, Panels — What's Best for Your Closet Setup?
Foam panels are popular because they’re easy to install, but they don’t stop sound from leaking out—they just reduce echo inside. Moving blankets and thick curtains absorb reflections and add mass, helping contain sound. Combining both is usually the best move.
For a small closet, 2-inch foam panels work well for mid and high frequencies. For low-end control, add bass traps in the upper corners or use thicker panels. Moving blankets can be draped over walls or hung in front of doors for a quick, DIY fix. Rugs and carpets also help tame reflections on hard floors.
For example, a DIY vocal booth built with foam panels and blankets can cut reverb and echo, making recordings sound studio-quality without expensive treatments.
Where to Place Acoustic Treatments for Best Results
Start by treating the first reflection points—these are the surfaces where sound bounces directly into your mic. Find out more about where to place acoustic treatments for best results. Use a mirror to find these spots on walls and ceiling. Place panels or blankets there to absorb harsh reflections.
Next, consider the corners for bass traps—these help control low-frequency buildup common in tiny rooms. Also, treat the door and window openings with seals or blankets. Keep the space flexible with removable or modular treatments so you can adapt as needed.
An example: mounting foam panels at ear level, hanging blankets at reflection points, and adding bass traps in the upper corners can produce a notable improvement in vocal clarity and reduce low-end muddiness.
Common Mistakes That Sabotage Your Closet Acoustic Setup
Relying solely on foam panels often leaves sound leakage untouched. For additional soundproofing tips, visit Acoustic Dampening, Placement, and the "Rig in the Closet" Setup. Ignoring sealing gaps around doors and seams is another mistake. Over-treating corners without addressing the main reflection points can also lead to subpar results.
Hard surfaces near the mic—like uncarpeted floors or bare drywall—can create harsh reflections. Also, neglecting ventilation makes the space hot and uncomfortable, risking hardware damage. Finally, not testing your setup with a simple recording or noise measurement can leave you blind to issues.
Pro tip: treat the first reflection points first, seal gaps, and combine absorption with soundproofing for best results.
DIY Closet Booths: What Works and What Doesn’t
DIY solutions like hanging blankets, stacking foam panels, and using removable mounts are popular because they’re cheap and flexible. These can turn a closet into a decent vocal booth without permanent modifications.
However, DIY treatments often lack proper sealing and bass trapping, leading to muffled sound or lingering low-end issues. Modular setups with removable foam and blankets help keep the space multi-purpose. Just remember: treat the first reflections, seal gaps, and ensure ventilation. Otherwise, you risk a boxy sound or overheating.
In short, DIY can work well if you’re strategic—focusing on reflection points and sealing gaps—without overdoing it.
Troubleshooting Common Closet Acoustic Issues
If your recordings sound boxy or dull, you probably have too many parallel surfaces and not enough diffusion or absorption on the right spots. Flutter echo can be tamed by placing soft materials at reflection points. Low-end buildup suggests bass traps are needed in the corners.
If the space still leaks noise, double-check door seals and gaps. For echo, add diffusers or scattering elements, not just absorbers. Overheating? Increase ventilation or switch to liquid cooling solutions. Remember, small spaces are a balancing act—sound absorption, sealing, and airflow all matter.
Testing with a simple microphone and recording a noise or voice sample helps identify problems quickly. Adjust treatments accordingly.
Frequently Asked Questions
What is the difference between acoustic dampening and soundproofing?
Acoustic dampening reduces echo and reflections inside a space, making the sound clearer and less harsh. Soundproofing blocks sound from escaping or entering, sealing gaps and adding mass to prevent noise leakage. They work together but serve different purposes.
How much treatment does a closet booth actually need?
For a small closet, treating the first reflection points with 2-inch foam panels, sealing gaps around the door, and adding bass traps in the corners usually suffices. More extensive treatment depends on your goals—e.g., professional voice-over or music production might require more bass trapping and diffusion.
Where should I place acoustic panels in a closet setup?
Place panels at the first reflection points—these are on the wall behind and beside the mic, identified using a mirror. Also, treat the ceiling near the mic and consider adding bass traps in upper corners for low-frequency control.
Should foam panels be enough for my closet?
Foam panels help reduce echo but don’t block sound leakage. Combining foam with sealing gaps, using blankets or curtains, and adding bass traps yields far better results for isolation and sound quality.
How do I prevent my closet booth from sounding muffled or boxy?
Focus on treating the first reflection points and avoid lining all surfaces with foam uniformly. Include some diffusion or scattering elements, and ensure your microphone isn’t too close to reflective surfaces. Proper ventilation also prevents sound dullness caused by heat buildup.
Conclusion
In the end, the best way to quiet a noisy rig or improve your vocal recordings isn’t over-complicated. It’s about smart placement—getting your rig out of your workspace, sealing leaks, and treating the primary sound reflections. Plus, with a bit of ventilation, you keep your hardware healthy and your mind focused.
Imagine a tiny closet transformed into a professional booth—quiet, cool, and ready for prime-time recordings. That’s the power of simple, strategic fixes. So, next time you’re tempted to buy more foam, ask yourself: can I just move it? Sometimes, the simplest change makes the biggest difference.