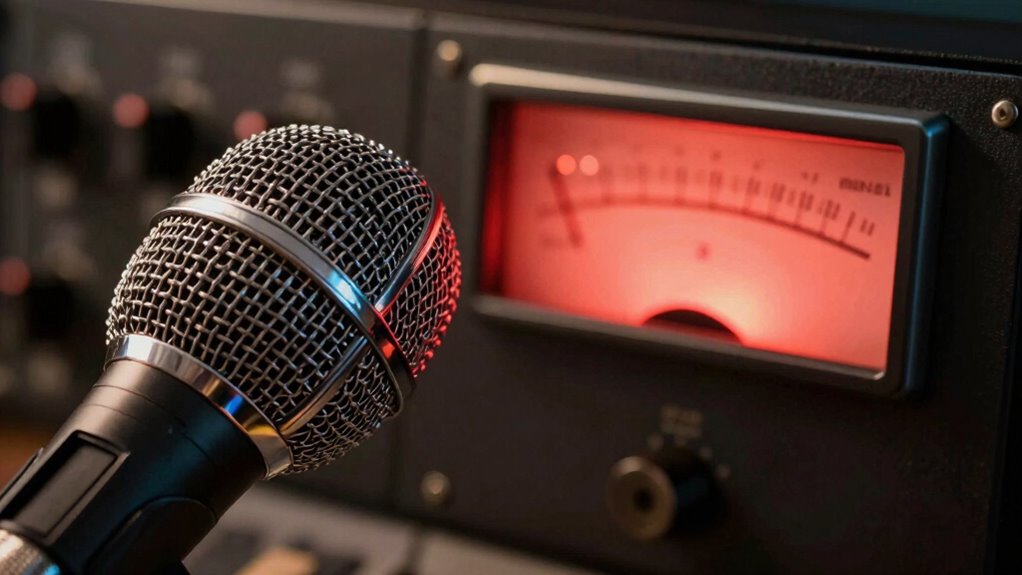

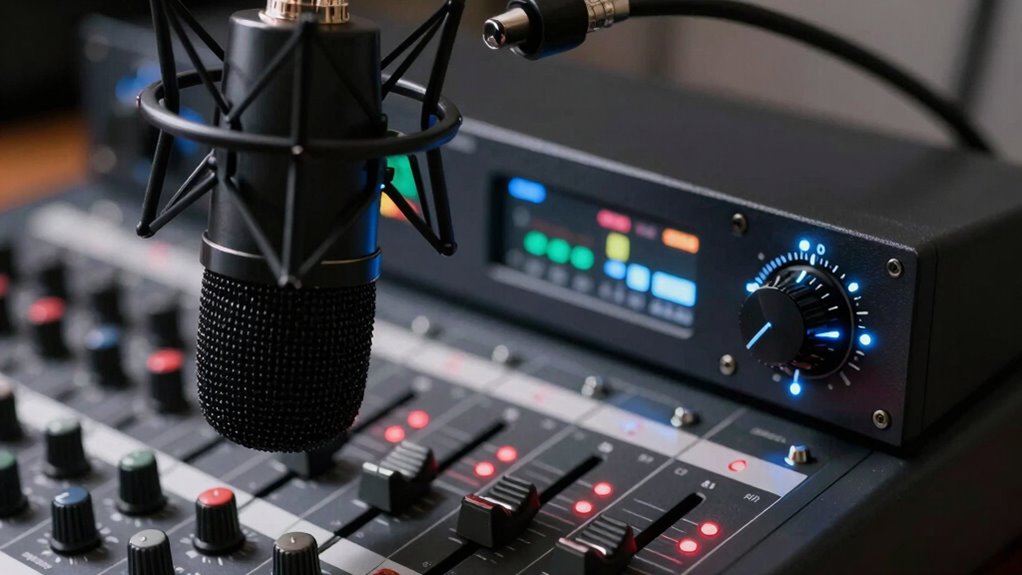
Microphone gain and volume are easy to confuse but serve different roles. Gain controls how sensitive your mic is to sounds before they’re amplified, while volume adjusts how loud the output sounds through speakers or headphones. Too much gain can cause distortion, harsh sounds, and clipping, especially if not balanced properly. If you want clear audio without problems, understanding and adjusting these settings correctly is key—keep going to learn more about mastering your microphone setup.
Key Takeaways
- Excessive microphone gain increases signal strength, leading to clipping and distortion during recording or live sound.
- Microphone volume controls output level; too high volume can cause feedback and harsh audio.
- Proper gain adjustment ensures clear sound without distortion, while volume manages loudness at the output stage.
- High gain amplifies background noise and reflections, risking audio clarity and causing distortion.
- Balancing gain and volume prevents clipping, maintains audio quality, and avoids sound distortion issues.

MRSDY USB Gaming Microphone for PC with Noise Reduction, Mute, Gain, RGB
Dynamic RGB lighting effect USB gaming microphone: Built-in 8 RGB lights to change various color modes by itself…
As an affiliate, we earn on qualifying purchases.
As an affiliate, we earn on qualifying purchases.
Why Your Microphone Sounds Bad: And How Gain and Volume Play a Role
If your microphone sounds off, it’s often because the gain and volume settings are misaligned. Poor sound quality can lead to feedback, distortion, or muffled audio, making communication frustrating. To improve, practice good microphone etiquette by maintaining a consistent speaking distance and avoiding sudden movements. Soundproofing techniques, like using foam panels or blankets, help reduce background noise and prevent unwanted sound interference. When gain is too high, your voice may distort or cause clipping, while too low gain results in weak audio. Adjust the volume correctly to guarantee your voice is clear without overwhelming the system. Properly balancing gain and volume ensures your sound is crisp, professional, and easy to understand, preventing common issues that make your microphone sound bad. Additionally, understanding the digital concepts behind audio settings can help you troubleshoot and optimize your microphone performance more effectively.
MAONO P1 Hybrid USB Audio Interface 70dB Gain for PC Phone iPad Guitar
HYBRID CONNECTIVITY: Dual USB ports with MFi-certified connectivity connect your computer and phone or iPad simultaneously. Record in…
As an affiliate, we earn on qualifying purchases.
As an affiliate, we earn on qualifying purchases.
Understanding Microphone Gain and How It Affects Your Sound
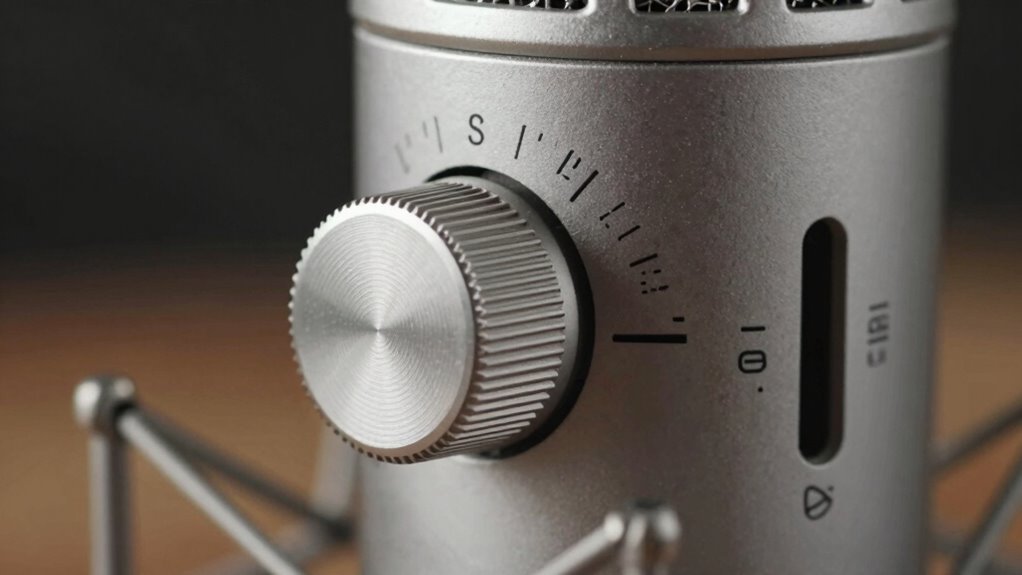
Understanding microphone gain is essential because it controls how strongly your microphone picks up your voice signals before they reach your audio system. Microphone sensitivity determines how well your mic captures sound, especially in different acoustic environments. If gain is set too high, background noise and echoes can become prominent, making your sound unclear. Conversely, if gain is too low, your voice may sound weak or muffled. Adjusting gain properly guarantees your microphone responds accurately to your voice, regardless of the room’s acoustics. Proper gain adjustment also minimizes the risk of sound distortion, ensuring a clearer and more professional audio experience. Additionally, understanding the relationship between gain and volume is crucial because they work together to shape your overall sound quality. Using the correct audio settings can significantly improve your recording or live sound, reducing the need for extensive post-production editing. Being aware of how audio equipment functions allows for more precise adjustments and better sound control. Recognizing Microphone sensitivity helps in fine-tuning your setup to prevent issues like distortion or insufficient sound pickup.

Volbox inline audio volume control attenuator 3.5mm 1/8" aux
INLINE VOLUME ATTENUATOR – Professional audio volume control provides precise level adjustment for headphones, speakers, and audio devices
As an affiliate, we earn on qualifying purchases.
As an affiliate, we earn on qualifying purchases.
What Does Microphone Volume Do, and Why Is It Important?
Have you ever noticed how turning up the microphone volume makes your voice louder on the speakers? That’s because microphone volume controls the output level, directly affecting how your voice is heard. It’s different from microphone sensitivity, which determines how much sound your mic picks up. Adjusting the volume properly is essential for effective volume calibration, ensuring your voice isn’t too quiet or overwhelming. If you set it too high, even small sounds can cause distortion; if too low, your voice may be inaudible. Understanding what microphone volume does helps you achieve clear, balanced sound. It’s a key part of managing your microphone’s overall performance and ensuring your audio setup works smoothly during recordings or live events. Properly setting these levels is also important in audio engineering to avoid unintended distortion. Additionally, being aware of audio levels helps prevent unintended clipping and ensures your audio remains clear and professional.

Focusound 52 Pack Acoustic Foam Panels 1" x 12" x 12" Sound Proof Foam Panles Soundproofing Noise Cancelling Wedge Panels for Home Office Recoding Studio with 300PCS Double-Side Adhesive
Soundproofing – Acoustic foam panels triangular grooves structure for better noise absorption, helps to reduce and absorb unwanted…
As an affiliate, we earn on qualifying purchases.
As an affiliate, we earn on qualifying purchases.
How Incorrect Gain Settings Can Cause Distortion
Setting your gain too high can cause your microphone to produce distorted sound. When the signal becomes too strong, it clips, leading to unpleasant, harsh noises. Understanding how to properly adjust gain helps prevent these issues and keeps your audio clear. Proper gain adjustment is essential for optimal audio quality and avoiding distortion issues. Additionally, being aware of audio engineering principles can help you fine-tune your settings for the best results, especially since the right balance can also depend on the overall audio system setup. Recognizing the influence of gain structure is crucial for maintaining clean, high-quality sound.
Overly High Gain Levels
When microphone gain is set too high, it can lead to unwanted distortion that compromises sound quality. This often happens when you neglect proper microphone placement or overlook acoustic treatment. Placing the microphone too close or too far from the source can cause the signal to spike, prompting you to increase gain unnecessarily. Without acoustic treatment, background noise and reflections can also cause you to boost gain excessively, amplifying unwanted sounds. High gain levels make your microphone more sensitive, so even minor sounds can become distorted. To avoid this, find an ideal microphone placement and consider acoustic treatment to control sound reflections, reducing the need to crank up gain and preventing distortion from overly high settings. Proper microphone placement is essential for achieving clear, distortion-free audio.
Clipping and Signal Distortion
Incorrect gain settings can cause your audio signal to clip, leading to distorted sound that’s harsh and unpleasant. When gain is too high, the signal exceeds the microphone’s headroom, creating a feedback loop and pushing the audio into clipping. This results in a distorted, harsh sound that’s hard to listen to. To avoid this, keep an eye on the noise floor, which is the background hiss or hum that can become more prominent when gain is set too high. Clipping often occurs when the input signal peaks past the maximum level, causing the waveform to flatten. Implementing data analytics can help monitor audio levels in real-time, preventing clipping before it occurs. Knowing how microphone gain interacts with other audio settings can also help maintain sound quality. Additionally, understanding the importance of proper audio level management can help ensure a clean and clear sound.
- Clipping distorts the original sound, making vocals or instruments harsh.
- It can cause feedback issues, especially in live settings.
- Proper gain adjustment prevents unnecessary amplification of noise and distortion.
Common Mistakes When Adjusting Gain and Volume

One common mistake people make when adjusting gain and volume is confusing the two, which can cause poor sound quality or distortion. Many overlook how microphone ergonomics impact their setup, leading to improper positioning that affects sound capture. Ignoring acoustic treatment can also cause reflections and background noise, prompting unnecessary gain increases that introduce distortion. Instead of focusing on proper placement and room acoustics, some increase gain or volume blindly, risking overload. Misunderstanding the roles of gain and volume results in inadequate control over sound levels. To prevent this, you should optimize microphone ergonomics by positioning the mic correctly and improving acoustic treatment to minimize noise. This helps you set appropriate gain and volume levels, reducing the chance of distortion.
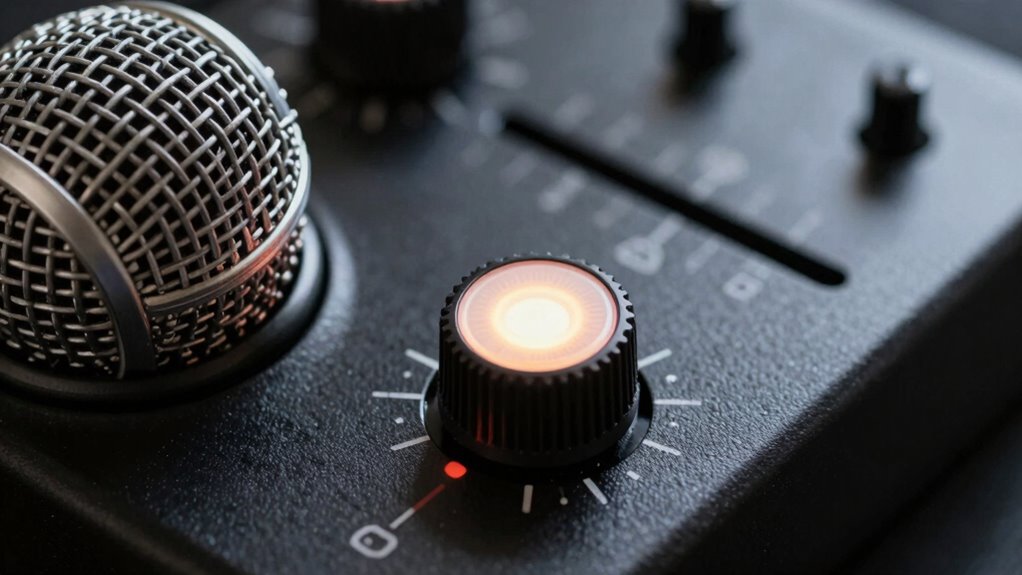
How to Set Your Microphone Gain for Clear Sound
Setting your microphone gain correctly is key to capturing clear, distortion-free sound. To do this, start by adjusting your gain so that your loudest sounds don’t cause peaking. Proper microphone placement helps by positioning the mic close to your source, reducing background noise and unnecessary reflections. Acoustic treatment in your space minimizes echo and reverb, making it easier to set an ideal gain level. Additionally, understanding sound dynamics can help you better manage your gain settings for varied audio sources. Recognizing the importance of passive voice detection can also improve your ability to write more clearly and effectively.
Being aware of room acoustics can further assist in creating an optimal environment for sound capture. Remember these tips:
- Place your microphone at an appropriate distance for your voice or instrument.
- Use acoustic panels or foam to control room reflections.
- Test by speaking or playing at your normal volume, then tweak gain to avoid clipping.
With the right placement and acoustic treatment, setting your gain becomes straightforward, ensuring clear and natural sound.
Tips for Balancing Gain and Volume During Recording
Start by adjusting your gain to make certain your signal isn’t too weak or too loud. Keep an eye on your monitor levels to prevent distortion, and remember that proper microphone placement can make a big difference. Combining these steps helps you achieve a balanced, clear recording. Additionally, ensuring your equipment is properly maintained can prevent unexpected issues during recording sessions. Regularly checking your equipment’s performance can help catch problems early before they affect your recordings. Paying attention to image quality principles like proper calibration and signal handling can further improve your overall audio clarity. Being aware of privacy policies related to your recording devices can also help protect your data and ensure compliance with regulations. Understanding spirituality insights, such as being mindful of balance and harmony, can also inspire a more intentional approach to your recording environment.
Adjust Gain First
To achieve a clear and balanced recording, it’s essential to adjust the microphone gain before touching the volume controls. Proper gain ensures your microphone captures sound accurately without distortion or excessive noise. Start by positioning your microphone correctly; good microphone placement minimizes the risk of audio feedback and ensures consistent sound levels. When adjusting gain, aim for a level where your voice sounds natural without peaking into distortion. Keep these tips in mind:
- Set gain low initially, then gradually increase while speaking normally.
- Avoid excessive gain, which can cause clipping and distortion.
- Test your setup by speaking at your typical volume to find the optimal gain level.
This process helps you prevent audio feedback and ensures your recording sounds professional.
Monitor Signal Levels
Once you’ve adjusted your microphone gain properly, keeping an eye on the signal levels during recording helps maintain sound quality. Proper microphone placement is key; position the mic to capture clear sound without clipping or distortion. Use acoustic treatment in your space to reduce unwanted reflections and ambient noise, which can skew your signal levels. Monitor your levels with headphones or your recording software’s meters, making sure they stay within a healthy range—neither too hot nor too quiet. If levels spike or dip, adjust your gain or volume accordingly. Consistently checking your signal helps prevent distortion caused by overly high levels, and guarantees a balanced sound. Remember, stable signal levels are essential for professional-quality recordings.
Use Proper Microphone Placement
Proper microphone placement is crucial for balancing gain and volume during recording because it directly influences the sound capture and signal levels. Correct placement ensures you avoid distortion and achieve clear, natural audio. To optimize your setup, consider these tips:
- Position the microphone close to the sound source while avoiding proximity effect, which can muddy the sound.
- Use acoustic treatment in your recording space to reduce unwanted reflections and background noise that can affect gain levels.
- Adjust the angle and height of the microphone to capture the best sound without needing excessive gain, which can cause distortion.
Signs Your Gain or Volume Are Causing Problems
If your microphone gain or volume settings are too high, you’ll likely notice distorted or clipped audio during recordings or live sessions. Common signs include harsh sounds, background noise becoming overwhelming, or your voice sounding unnaturally loud. Poor room acoustics can amplify these issues, making distortion more noticeable. Different microphone types react differently to gain settings, so watch for inconsistent clarity or feedback. Use the table below to identify typical problems:
| Issue | Cause | Solution |
|---|---|---|
| Clipped audio | Excessive gain | Lower gain or volume |
| Background noise | High sensitivity microphones | Adjust gain or use noise gate |
| Distorted voice | Poor room acoustics | Improve room setup |
Keep an eye out for these signs to prevent audio problems.
Best Practices for Maintaining Great Microphone Settings
Maintaining great microphone settings requires regular attention to guarantee consistent audio quality. To do this, start by regularly checking your microphone accessories—like windscreens and pop filters—to verify they’re clean and properly positioned. Adjust your settings based on your recording environment, whether it’s a noisy room or a quiet studio, to avoid distortion. Keep your gain and volume levels balanced; too high can lead to clipping, while too low results in weak sound. Use a reliable audio interface or mixer to fine-tune your sound. Additionally, perform test recordings often to catch issues early. Remember, consistent maintenance of your microphone setup helps prevent problems and ensures your recordings stay clear and professional.
Frequently Asked Questions
Can High Gain Damage My Microphone?
High gain can potentially damage your microphone’s durability if you frequently set it too high, as it forces the microphone to work harder and may cause internal stress. Proper gain adjustment is essential to prevent distortion and protect your equipment. Always start with a lower gain setting and gradually increase it until you achieve clear sound without clipping, ensuring your microphone stays in good condition over time.
How Do I Know if My Volume Is Too Loud?
You can tell your volume is too loud if you notice increased background noise or feedback. If your microphone squeals or there’s a harsh, distorted sound, reduce the volume immediately. Keep an eye on your levels to prevent feedback and background noise from overwhelming your sound. Adjust the volume gradually, testing frequently to find a balance that avoids distortion and guarantees clear, crisp audio without causing discomfort or technical issues.
What’s the Difference Between Gain and Volume in Live Sound?
You might think gain and volume are the same, but they actually shape your audio signal differently. Gain controls how much the microphone boosts the initial sound, affecting overall sound quality and preventing distortion. Volume adjusts the loudness you hear, without modifying the original signal. So, setting gain correctly guarantees a clean audio signal, while volume levels let you control how loud your sound is for your audience.
Does Microphone Placement Affect Gain and Volume Settings?
Yes, microphone placement affects both gain and volume settings. Proper microphone positioning guarantees you capture clear sound quality without needing excessive gain, which can cause distortion. When you position the mic too close or too far, you might find yourself adjusting gain or volume more often, leading to muddiness or feedback. To optimize sound quality, keep the microphone at an ideal distance, reducing the need for excessive gain or volume adjustments.
How Often Should I Recalibrate My Microphone Settings?
You should recalibrate your microphone settings regularly, ideally every few weeks, to maintain sound consistency. Frequent microphone calibration guarantees your gain and volume levels stay accurate, preventing distortion or uneven audio. If you notice changes in sound quality or if your environment shifts, recalibrate sooner. Consistent calibration helps keep your audio clear and professional, making sure your recordings or broadcasts sound just right every time.
Conclusion
Remember, your gain and volume settings are like the engine and speedometer of your microphone—they both need to work in harmony. Too much gain can cause distortion, like revving your engine too high, while too little makes your voice sound muffled, like driving in a fog. Finding that sweet spot isn’t just technical; it’s about making your voice clear and natural. Keep experimenting, stay attentive, and let your sound shine without the noise.